How to Create the Perfect Display for Your Disney Pin Collection

What's the Best Way to Display Disney Pins Without Damaging Them?
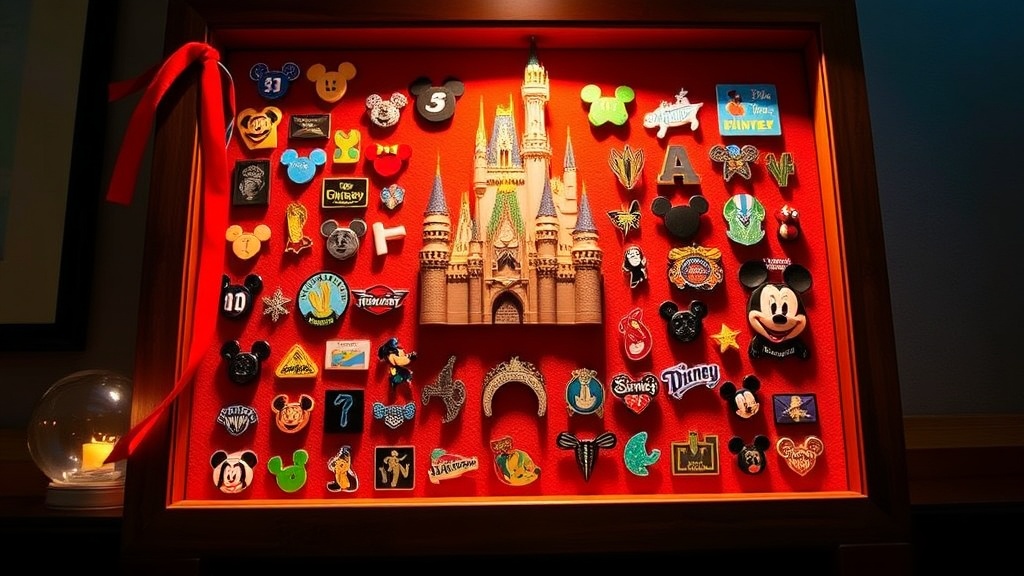
The right display method keeps pins pristine while showing them off. Cork boards work well for casual collectors (soft enough to prevent scratches), while shadow boxes and deep frames protect against dust. For high-value pins — think limited edition releases or hard-to-find character sets — enclosed cases with UV-protective glass prevent fading and oxidation. The key is matching the display style to the pin's value and the collector's space.
Most Disney pins feature delicate enamel finishes and rubber or metal backs that can degrade with handling. Direct sunlight fades colors fast. Humidity warps cardboard backings. The catch? Even "display only" pieces need occasional rotation to prevent uneven aging. Here's what experienced collectors know: environment matters as much as the display itself.
Victoria's climate — damp winters, dry summers — means local collectors often use silica gel packets inside cases. (Michael's and Hobby Lobby both stock resealable desiccant packs by the framing section.) For wall displays, avoid exterior walls that collect condensation. Interior walls maintain steadier temperatures, which enamel appreciates.
How Do You Organize a Large Disney Pin Collection for Display?
Sort by theme, character, park, or release date — then stick to one system. The most satisfying displays tell a story, and that story falls apart with mixed categories. A well-organized collection starts with inventory. Most serious collectors use spreadsheets or apps to track what's displayed versus what's stored.
Here's the thing: categorization isn't just aesthetic. It affects which display hardware you'll need. Character-specific collections (all Stitch, all Princesses) often fit standard frames with even rows. Park-specific sets — think Disneyland 50th Anniversary or EPCOT Festival releases — vary wildly in size and shape. That variation demands flexible layouts.
Popular Organization Methods
| Method | Best For | Display Type |
|---|---|---|
| By Character | Single-character collectors, kids' rooms | Themed shadow boxes, pin books |
| By Park/Location | Travel memorabilia collectors | Map backdrops, cork boards |
| By Release Date | Completionists, limited edition hunters | Timeline displays, album pages |
| By Event | Convention attendees, annual passholders | Event-specific frames, trading lanyards |
That said, hybrid approaches work too. Some collectors organize by character for display pieces, then by value for storage. The rule: be consistent enough that finding any single pin takes under thirty seconds. (Frustration kills the joy of collecting faster than dust ever could.)
Physical Organization Tools
Pin traders at Disneyland and Disney World swear by specific products:
- IKEA RIBBA frames — deep enough for most pins, cheap enough to buy in bulk, and the white mat background makes colors pop
- Shadow boxes from Michaels — deeper than standard frames, perfect for pins with elaborate backings or 3D elements
- Cork tiles from Staples — modular, repositionable, and pins stick directly without extra hardware
- Pin trading books from Amazon — the COLLECTOR Playing Card and Pin Album and similar brands offer padded pages that prevent scratching during transport
Deep shadow boxes accommodate pins with deluxe backings — those thick cardboard stands that come with limited releases. Flat frames crush those backings. Worth noting: many collectors remove deluxe backings for display, storing them separately in labeled envelopes. It's a space trade-off that keeps walls looking clean.
What Are the Most Creative Disney Pin Display Ideas?
Beyond standard frames, collectors use lanyard walls, map backdrops, character silhouette cutouts, and rotating stands to add personality. The best displays reflect the story behind the collection — not just the pins themselves. A cruise collector might mount pins on a miniature ship wheel. Someone who hits every RunDisney event might arrange medals and pins together on a race bib backdrop.
Victoria's local Disney community — active at Fantasy Garden and through The Pin Traders of Victoria Facebook group — shares creative solutions constantly. One collector mounted an entire Beauty and the Beast set inside a shadow box lined with vintage sheet music. Another created a "trading board" from an old window frame, chicken wire, and clothespins for swap meet displays.
Themed Display Concepts
Map Backdrops: PinPics and Disney Parks both sell park maps that make perfect backgrounds. Lay a Disneyland map behind California Adventure pins. Use a vintage EPCOT Center map for retro Figment collections. The maps add context and color without competing with the pins.
Character Silhouettes: Cut Mickey ears or character shapes from black foam board. Arrange pins inside the silhouette using the shape as a border. This works especially well for silhouette-specific releases — the black and white Mickey Mouse series, for example.
Lanyard Walls: Instead of hiding lanyards in drawers, stretch them across a wall using decorative hooks. Disney's official trading lanyards — the wide satin ones sold at parks — come in dozens of designs. They double as decor when not in use. (The catch? Lanyards collect dust. Plan to shake them out monthly.)
Rotating Stands: For desk or shelf displays, acrylic rotating stands (the kind used for earrings at craft fairs) let viewers spin through collections. Amazon sells MOOCA and Sooyee brand rotating organizers for under $25. These work best for smaller collections or "featured pin" rotations.
How Much Should You Spend on Pin Display Materials?
Budget $50-200 for a starter display setup covering 50-100 pins, scaling up based on collection size and framing quality. The range is wide because options vary from thrifted cork boards to custom UV-protected museum cases. Most collectors land somewhere in the middle — IKEA frames, Amazon basics, and occasional splurges for centerpiece pieces.
Here's a realistic breakdown for someone displaying 100 pins:
| Item | Budget Option | Mid-Range | Premium |
|---|---|---|---|
| Main Display Frame | $15 (IKEA RIBBA) | $40 (Michaels shadow box) | $150+ (Custom UV case) |
| Backing Material | $5 (Cork tile) | $12 (Felt board) | $30 (Archival foam) |
| Mounting Supplies | $3 (Push pins) | $8 (Pin backs, adhesives) | $20 (Museum putty, acid-free tape) |
| Storage/Transport | $10 (Ziplock system) | $25 (Pin trading book) | $60 (Hard case with foam) |
| Total | $33 | $85 | $260+ |
That said, start small. Buy one quality frame for favorite pieces. Use affordable storage for the rest. Upgrade as the collection grows — not before. Many collectors regret early " Display everything!" enthusiasm that resulted in crowded, dusty walls.
Money-Saving Tips from Experienced Collectors
Thrift stores in Victoria — Value Village on Douglas, Savers in Langford — frequently carry deep frames and shadow boxes for under $10. Remove the glass, add cork or felt backing, and you've got a custom pin display for a fraction of retail. Estate sales often yield vintage display cases with character that fits Disney's aesthetic perfectly.
Another trick: buy damaged frames at Michaels during clearance events. Cracked glass doesn't matter if you're replacing it with cork or removing it entirely. The frame structure — molding, depth, hanger — works fine with minor cosmetic damage.
How Do You Protect Valuable Disney Pins While Displaying Them?
High-value pins need climate control, UV protection, limited handling, and secure mounting to prevent loss or damage. Pins worth $50+ deserve individual attention. The most common damage sources — sun fading, humidity corrosion, and scratched enamel — are preventable with basic precautions.
UV-protective glass or acrylic filters the light spectrum that fades pigments. Regular glass doesn't. For pins displayed in bright rooms (or anywhere with natural light), UV filtering isn't optional — it's the difference between vibrant colors and washed-out pastels five years later. Michael's offers UV-protected custom framing; so does Frame Depot on Fort Street in Victoria. The upgrade costs roughly 40% more than standard glass.
Security and Stability
Pin backs fail. Rubber Mickey backs crack and loosen. The newer "locking" backs are better but not perfect. For displayed pins — especially heavy ones or those in high-traffic areas — add a secondary securing method.
- Museum putty (available at Staples and art supply stores) holds pins to backing boards without permanent adhesion
- Foam inserts behind the pin post prevent wobbling that loosens backs over time
- Acrylic display cases with doors prevent both dust and accidental bumps
Worth noting: some collectors seal pins behind glass permanently. This protects against dust and handling but eliminates the ability to trade or rearrange. It's a commitment — one most traders avoid. The happiest medium? Shadow boxes with hinged fronts. Displayed, protected, still accessible.
Climate and Environmental Control
Enamel and metal react to humidity. In coastal climates like Victoria, displayed pins benefit from dehumidifier use in display rooms. Small silica gel packs (the kind that come with electronics and shoes) tucked into frame corners absorb ambient moisture. Replace them every six months — they saturate silently.
Temperature swings cause metal backings to expand and contract, loosening pin posts. Avoid displaying pins above radiators, near HVAC vents, or in direct sun (which creates mini-greenhouse heat inside frames). Stable room temperature preserves both the pin and its backing integrity.
"The best display is the one you'll maintain. A dusty glass case looks worse than a clean cork board. Pick a system that matches your cleaning habits, not just your aesthetic dreams." — advice repeated at Victoria Pin Traders meetups
Displaying a Disney pin collection transforms accumulated pieces into a viewable archive of memories, trades, and hunts. Whether the approach is minimalist frames or elaborate themed installations, the principles stay consistent: protect the investment, organize thoughtfully, and build something that brings satisfaction every time you walk past. (And maybe leave room for the next release — there's always another pin.)
Steps
- 1
Choose the Right Display Method for Your Space
- 2
Organize Pins by Theme, Color, or Release Date
- 3
Protect and Maintain Your Collection Long-Term